
What's new in Radi v0.9
2012.06.27
-
Radi now supports realtime GPU-accelerated filters that are rendered in the browser using WebGL.
For a better idea of what this means, check out the demos: Radi + WebGL
Filters can be applied to Canvas and Video elements. When published, Radi creates the necessary WebGL code to render the filter on the GPU using the Canvas or Video element as a texture source.
It's possible to change the filter and its parameters programmatically using JavaScript. The demo page shows examples of this. There is also a sample project available there.
To use a WebGL filter, select a Canvas or Video element and look in the Inspector:
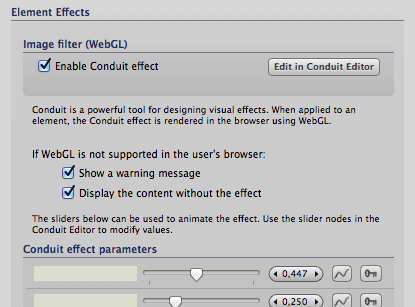
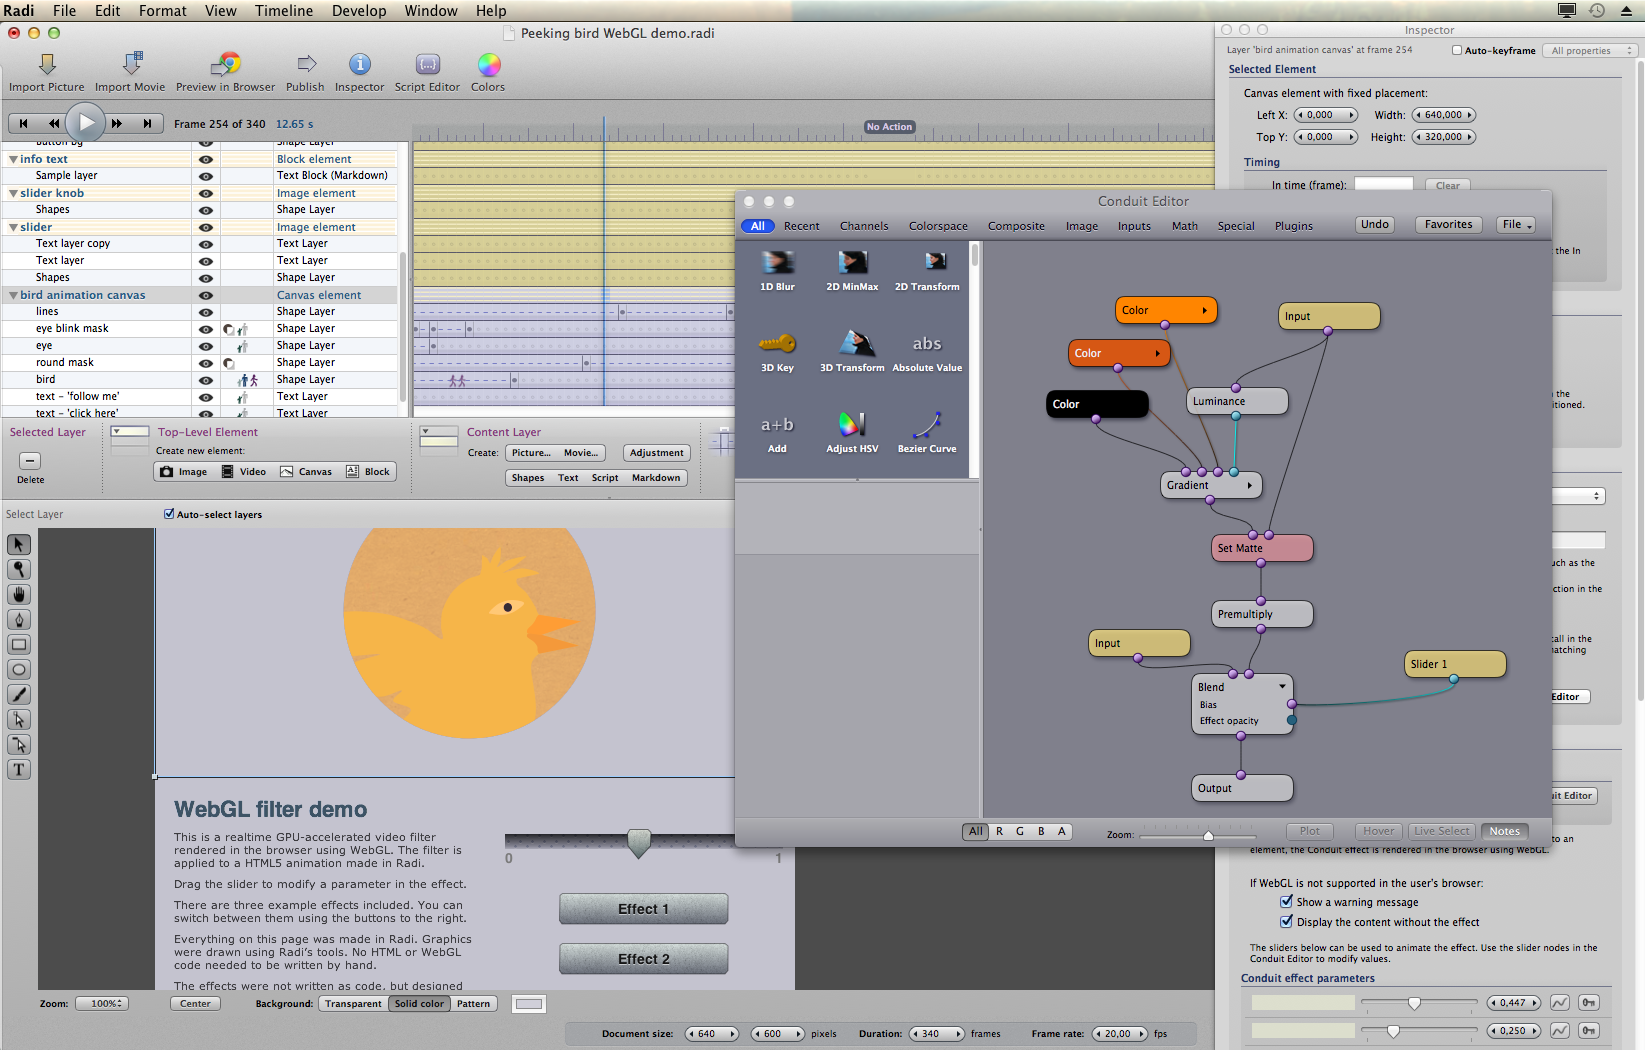
Effects are created using Conduit, so the process is completely visual:

WebGL is very much cutting-edge technology, so expect some bumps in the road... WebGL is enabled by default in Chrome and Firefox, at least. In Safari, it needs to be enabled through the Develop menu (which in turn can be enabled in Safari's Preferences).
Safari seems to have trouble rendering a filter on a video. The frame rate is not good on my system. (I think this is related to the video being hidden by the filter layer - maybe Safari is trying to optimize as it assumes the video is not visible?) For Canvas content, Safari seems to work great, though.
Radi's Conduit-to-WebGL export is still limited in its capability. Currently it only supports "pixel-independent" effects, i.e. those that can be rendered in a single pass on the GPU. Conduit can compile most nodes down to this form, but some require sampling and multiple passes. These nodes include Gaussian Blur, 2D Min/Max, 2D Transform and others (most of which are in the 'Image' category in the Conduit Editor). Radi will warn you about this when exporting.
Another important limitation is that there are currently no secondary image inputs for the filter. You get the source image, and that's it... This is a limitation that should be easy to lift, as Conduit does support multiple image inputs and embedded images.
-
Improvements and fixes to event scripting in elements.
The current Radi document is now accessible within an event handler script as: event.radi
This object has some useful methods, for example 'start', 'stop' and 'goToFrame' for controlling the timeline.
You can also access an element's information in runtime. Radi creates an 'elementInfo' object for each published element. To get this element for the element targeted by the event (i.e. a clicked element), use: event.radi.getElementByName(event.radi.radiElementName);
To get another element, you can use the layer's name. This is the name given to the layer in Radi's Timeline view. For example, if you want to access a video element that's named 'myVideoElement' in Radi, you need to first get the element info, then get the matching HTML element. Here's the code:
var elInfo = event.radi.getElementByName('myVideoElement');
var element = document.getElementById(elInfo.htmlID);Since Radi provides JQuery by default when events are active in a document, you can also write:
var element = $('#'+event.radi.getElementByName('myVideoElement').htmlID);Aside from the HTML element id, the 'elementInfo' object contains descriptions of the element's timing, and other details that are not generally useful. But if you're using WebGL filter effects, you can access the filter object using 'elInfo.glFilter'. For example, to set the value of the filter's first slider input to a value of 0.5:
elInfo.glFilter.setConduitSliderValue(0, 0.5) -
Fixed bug where dragging a selection of multiple layers would only drag one of them.
-
Fixed bug where a pattern's offset would not be correctly saved.
-
Fixed bugs related to how elements react to document size changes.
Each Radi version tends to focus on slightly different features. For the previous version's updates, see
What's new in Radi 0.8.4
Copyright 2012 Lacquer oy/ltd. All rights reserved.